June 18, 2012: Started laying the laminate flooring in the "Boatroom". The pattern selected was SPALTED MAPLE.
First step was to put 3/8 " strips all around the perimeter of the room. Found out later they should be attached pretty solidly, so that you can tap your pieces against them as you install them. The strips are a "must" to the success of the project.
Then we installed the pad. 9 am to 11:30 am. We had to piece it somewhat in the last corner. We couldn't find any instructions in the boxes of flooring for some time - about the 5th box, we found a set of instructions. It said to put down one strip of pad, then lay down the flooring, then add another strip of pad, and then lay down flooring, etc. We put the pad down over the whole floor and then started laying the flooring. Seemed to work okay anyways.
We started out with 10 boxes of laminate flooring - each piece is 7.5 inches x 50.5 inches.
This took from 11:30 am until 2:30 pm.
We got back to work after a long lunch - so worked from 5 pm til 8:30 pm.
We stopped here for the day. We have installed six boxes, with four boxes left. We hope we have estimated correctly. We have to lay 5 more strips at 19 ' each, which should give us several pieces to spare.

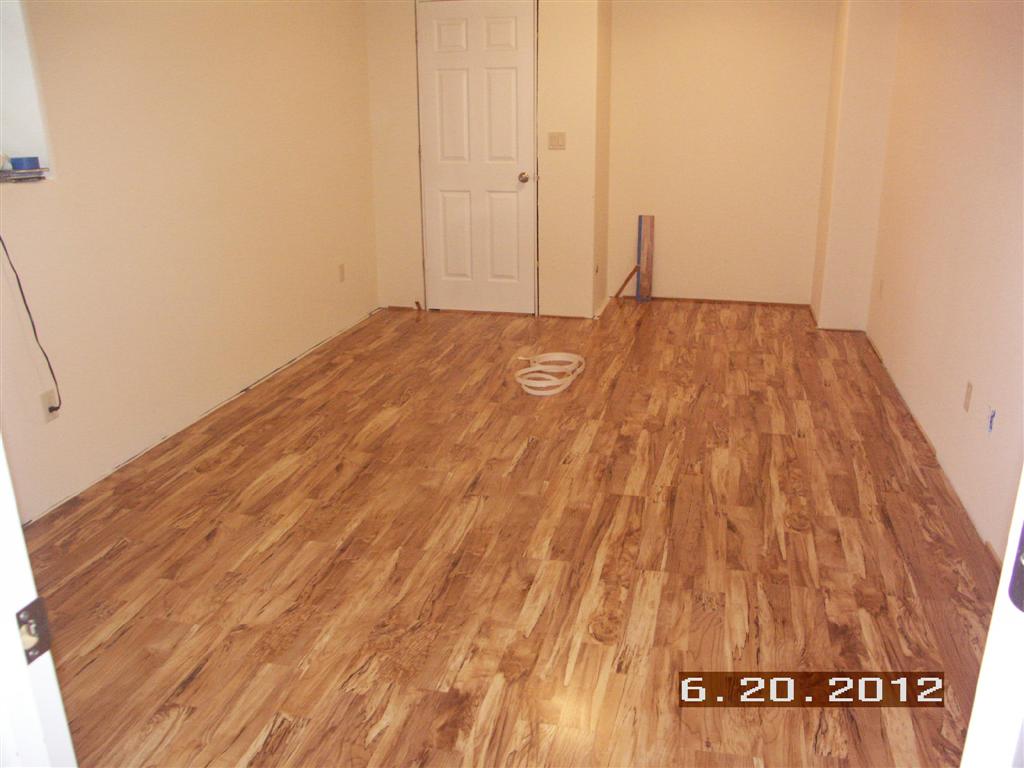
June 19, 2012 - 10 am to Noon - finished the last twenty or so pieces. Here's the view looking into the room toward the closet and the book nook - with all but the little pieces left:
View looking out from the room toward the stairs:
One of the things that I didn't get a chance to read in the instructions ahead of this time was the Warning to make sure the last row would be more than 2.5 inches wide. If it was going to be less, you can compensate for this by ripping a couple inches off the very first row. This is very common practice in laying ceramic tile, but I managed to not remember this technique. Unfortunately, my last row was between 1.25 inch wide to .625 inches wide. This is not normally acceptable, but this small row will be covered by the base molding, so will not affect the look of the layout.
Here's the view of the east wall before adding the tiny little strips to finish it off.
Here's the other place that needed a special cut - this piece was 1 3/8 inches wide.
Here's a view looking from the family room into the boat room.
Here's the east wall with the very tiny strips installed and glued.
Here's the view of the 1 3/8" strip in the book nook:
Kathie started bringing in samples of baseboard to see which would look best with the SPALTED MAPLE flooring:
Here's the left over pieces - 4 complete pieces and 4 with about a 1 inch strip ripped from the top side. Note all the empty boxes stacked up - yahoo!
Here's the transition piece from the hallway ceramic tile to the laminate flooring:
Here's the transition piece from the laminate flooring to the ceramic tile in the closet.
Here's the completed flooring for the BOAT ROOM as viewed from the hallway:
So now to complete the other remaining tasks in the room, we will need to install door casings (2 doors), paint the door casings, stain and seal the baseboard molding and cove, install the baseboard molding and cove, install a coax connector, install an ethernet connector on the 8 wire cable, and build/install the closet shelf and clothes rack.
----------------------------------------------
And in the meantime, there is another project to work on - assembling the Father's Day BBQ!
the end


